



Car Seat Installation Guide: Step by Step for Rear Facing Seats
Bringing your newborn home is a big moment for parents. It fills them with joy and a big responsibility. Your peace of mind starts with knowing your child is secure.
These special seats are made to protect a child’s head, neck, and spine in a crash. We’ve made a detailed car seat installation guide step by step for rear facing seats. If you’re looking, check out our latest list of infant car seats with the highest safety ratings this year.
We aim to make installing a rear-facing car seat easy and stress-free. By using these steps, you’ll feel confident in keeping your family safe on the road.
Key Takeaways
- Rear-facing seats are key for a child’s spine and neck support.
- Always check your vehicle and seat manual before starting.
- A secure base should not move more than one inch in any direction.
- Use built-in lock-offs or tensioners for a firm connection.
- Make sure your child fits within the seat’s height and weight limits.
Understanding the Importance of Rear Facing Seats
The way your child sits in the car can save their life in an accident. By following a car seat installation guide step by step for rear facing seats, you create a safe space for them. This is based on the latest safety research in the U.S.
Why Rear Facing is Safer for Infants
Rear-facing seats support a child’s head, neck, and spine better. In a crash, the seat absorbs the impact, keeping the child safe. This is why they are the safest choice for kids.
“Rear-facing car seats are the safest way for children to ride because they provide the best support for the head, neck, and spine.”
This setup significantly reduces the chance of serious injury. It ensures the seat absorbs crash energy, not the child’s body.
Recommended Age and Weight Limits
The American Academy of Pediatrics says kids should stay in rear-facing seats as long as possible. Keep your child in this position until they reach the maximum weight or height limit of their car seat.
- Check your seat’s manual for specific height and weight thresholds.
- Don’t switch to forward-facing just because your child is one year old.
- Most seats are made for kids well into their toddler years.
Common Myths About Rear Facing Seats
Some parents think their kids are uncomfortable because their legs are cramped. But kids are remarkably flexible and often sit naturally with their legs crossed or bent.
Another myth is that kids will be bored or can’t see out the window. But most rear-facing seats are high enough for kids to see the world while staying safe.
By ignoring these myths, you focus on keeping your child safe. A reliable car seat installation guide step by step for rear facing seats ensures top protection for your family.
Selecting the Right Rear Facing Car Seat
Choosing the right rear facing car seat installation is key to safety. With so many options, picking the right one can be tough. Think about your child’s age and your car’s layout to make a safe choice.

Types of Rear Facing Car Seats
There are three main types of seats for rear-facing travel. Infant-only seats are light and easy to carry. They have a base that stays in your car. They’re great for newborns but grow out of them quickly.
Convertible seats last longer because they can switch to forward-facing. All-in-one models cover every stage from baby to booster. Your choice depends on your budget and how long you want the seat to last.
| Seat Type | Primary Benefit | Weight Limit |
|---|---|---|
| Infant-Only | Portability | Low to Medium |
| Convertible | Longevity | High |
| All-in-One | Versatility | Very High |
Features to Look For
Look for seats that make rear facing car seat installation easy. Features like built-in level indicators help get the seat right. A no-rethread harness lets you adjust straps as your child grows, without taking the seat apart.
Also, check for strong LATCH connectors and steel frames. These improve the seat’s safety in crashes. Choose seats that safety groups highly recommend.
How to Choose the Best Fit for Your Vehicle
Make sure the seat fits your car before buying. Check your car’s manual for anchor points and seat belt locks. A too-large seat can block the front seat from moving back.
Measure your backseat to ensure the seat doesn’t block your view or take up too much space. The seat base must sit flat against the cushion for proper rear facing car seat installation. For smaller cars, look for seats that save space without losing safety features.
Preparing for Installation
Getting ready is key to a good rear facing car seat installation. First, make a clean and organized space. This helps you avoid mistakes and keeps your child safe on trips.
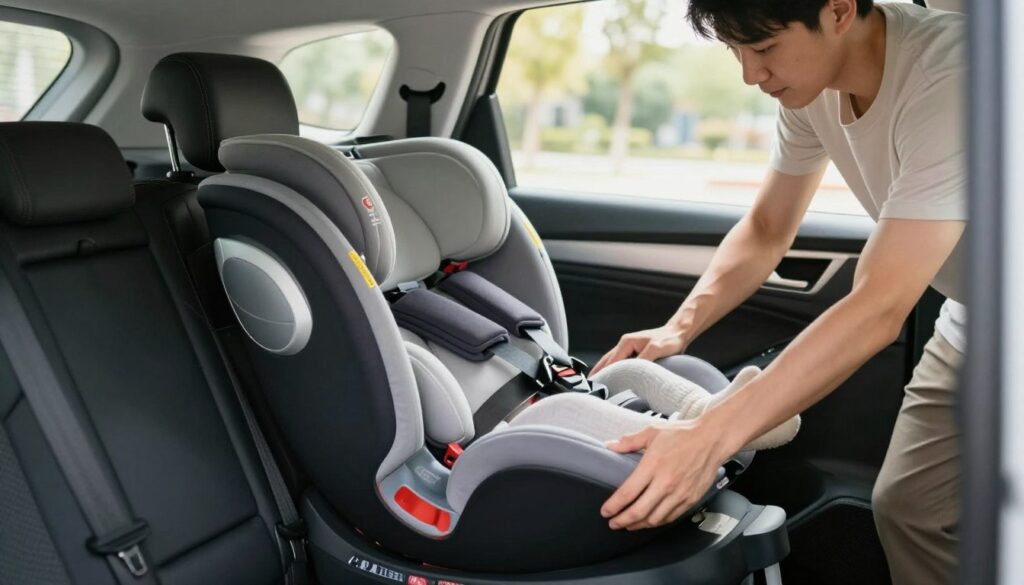
Reading the Manufacturer’s Instructions
Every car seat has its own manual. It’s important to read it well before you start. The manual tells you about weight limits, height rules, and how to use seat belts or LATCH connectors.
If you lost your manual, check the manufacturer’s website for a digital version. Knowing these instructions is the first step to a safe setup. For older cars, our blind spot detection systems installation guide might help with safety.
Gathering Necessary Tools and Materials
Before you start, get all the tools you need. You’ll likely need a towel or pool noodle for leveling and a flashlight for dark spots. Having these ready helps you work smoothly.
Park your car on a flat surface for easier installation. Remove any loose items from the back seat. A clean space lets you focus on a tight fit.
Checking Your Vehicle’s Compatibility
Your car’s interior affects how the seat fits. Never install a rear-facing child safety seat in front of an active airbag. This rule is vital for your child’s safety in a crash.
Look in your car’s manual for the safest seats. Find the LATCH anchors and seat belt types. Knowing this ensures your rear facing car seat installation is safe for your car.
Step 1: Positioning the Car Seat
Getting the placement right is key in our guide on how to install rear facing car seat models. The right spot is the foundation for a secure installation. It requires attention to your vehicle’s interior.
By choosing the best spot, you ensure your child’s safety on every trip.
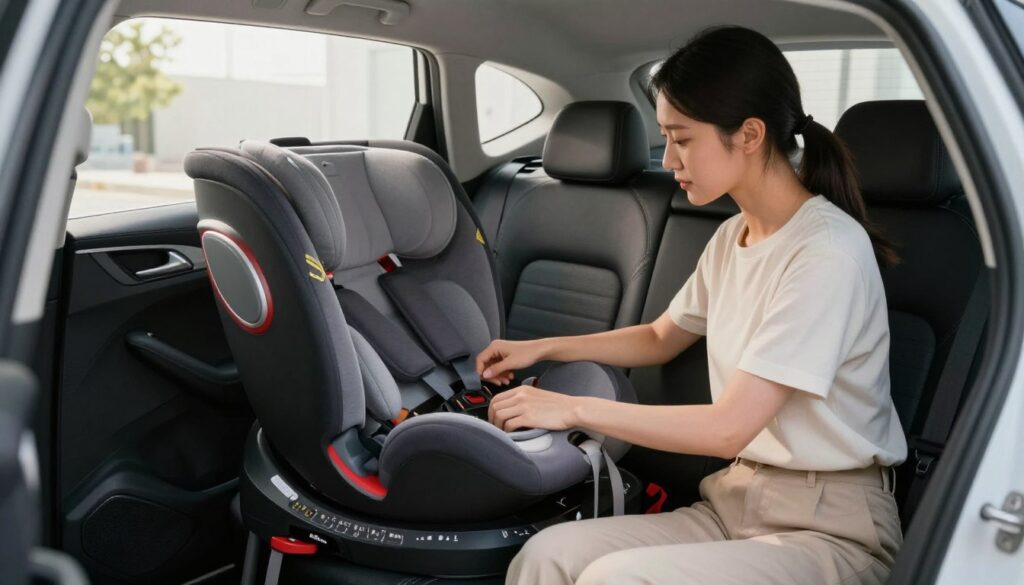
Choosing the Right Location in the Vehicle
The middle of the back seat is safest because it’s far from side-impact collisions. But, if your center seat is too narrow, a side seat is okay. Think about these factors when picking a spot:
- Driver Legroom: Make sure the front seat doesn’t push against the car seat.
- Sidewalk Access: The passenger-side rear seat is safer for loading your child away from traffic.
- Vehicle Safety: Check crash test results for affordable compact cars to see how your vehicle does.
Ensuring the Seat Isn’t Obstructed
After picking a spot, clear the area of loose items. Never put toys, blankets, or heavy objects near the seat base. They can make the seat fit poorly.
The car seat should fit snugly against the vehicle upholstery. If your vehicle has adjustable headrests, remove or raise them for a flat fit. A clear path ensures the seat works as intended.
Making Sure the Angle is Correct
A proper recline is key for your baby’s safety. Most seats have angle indicators for the right setup. For example, a Chicco seat’s bubble level should be within the lines in the manual.
For a rear facing car seat installation demonstration, follow your model’s angle needs. If the bubble is off, use a towel or pool noodle to adjust. Always check the indicator after adjusting to keep the seat safe.
Step 2: Using the LATCH System
If you’re wondering how to install a rear facing car seat, the LATCH system is a great option. LATCH stands for Lower Anchors and Tethers for Children. It’s a special way to secure seats without using the car’s seat belt. Remember, never use both the seat belt and LATCH at the same time. Pick the method that fits your car best.

Understanding LATCH Components
The LATCH system has two parts: the lower anchors in the car and the connectors on the seat. The anchors are metal bars hidden where the seat cushion meets the back. You can find them by feeling for metal loops or looking for small plastic guides.
How to Properly Attach the LATCH Connectors
First, find the LATCH connectors on your seat, usually on adjustable straps. Match them with the anchors in your car and push until you hear a click. Then, pull the strap to remove slack and make sure the seat fits snugly.
Verifying LATCH Tightness
After tightening, check the installation with a simple test. Hold the seat at the base and pull it side-to-side and front-to-back. It should not move more than one inch. If it does, tighten the straps more or try the seat belt method.
| Feature | LATCH System | Vehicle Seat Belt |
|---|---|---|
| Primary Attachment | Metal Lower Anchors | Vehicle Locking Retractor |
| Ease of Use | High (Click-in style) | Moderate (Requires threading) |
| Weight Limits | Subject to Seat Limits | Subject to Vehicle Limits |
| Compatibility | Most Vehicles Post-2002 | All Vehicles |
Step 3: Installing with the Vehicle Seat Belt
Learning to use your car’s seat belt is key to keeping your child safe. Many cars have LATCH anchors, but using the seat belt is a highly effective alternative. It ensures a secure fit if done right. Follow these car seat safety tips for rear facing to get a stable installation every time.
Identifying the Seat Belt Routing
First, check your car seat manual to find the right belt path. Each seat has special channels for the seat belt. Never guess where it goes, as the wrong path can ruin the installation.
Threading the Seat Belt Correctly
After finding the path, thread the belt through the slots. Make sure it’s flat and not twisted, as twists can weaken it. Removing all slack from the lap belt is key to keep the base stable.
Locking the Seat Belt in Place
After threading, lock the belt in place to stop the seat from moving. Most cars have a locking mechanism. If not, you might need a locking clip from your car seat. Always check that the base doesn’t move to follow the best car seat safety tips for rear facing.
Step 4: Checking the Tightness of the Installation
A secure installation is key to protecting your child on the road. After setting it up, check its stability. This ensures it works right in sudden stops or crashes. Follow these car seat safety tips for rear facing models for peace of mind.
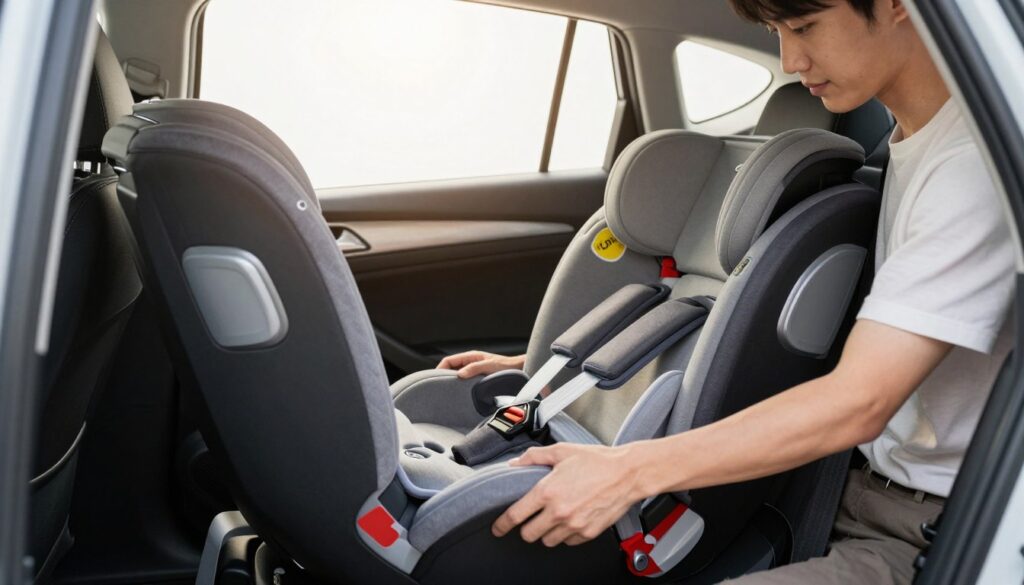
Testing the Installation with the ‘Pinch Test’
Do the inch test by grabbing the seat at the belt path. Pull it side to side and front to back with your non-dominant hand. If it moves more than one inch, tighten it more.
Verifying the Angle of the Car Seat
Right angle is key for your child’s airway and comfort. Modern seats have level indicators like bubbles or lines. Check these after tightening to ensure the seat is in its optimal position.
Making Adjustments as Necessary
If the seat moves too much, don’t worry. Just take it out and start again for a tighter fit. A small tweak in webbing pull or angle can help a lot. Keeping it tight is a non-negotiable part of car seat safety.
Step 5: Securing Your Child in the Car Seat
After setting up the seat, we focus on keeping your child safe. A stable base is key, but the harness is the main protection. We need to make sure every strap is in the right place to keep your child safe.

Adjusting the Harness Straps Properly
First, put your child in the seat with their back against the shell. Then, put the harness straps over their shoulders and buckle them up. Make sure the straps are tight against your child’s body.
To check if the straps are tight enough, do the pinch test. If you can pinch the webbing at the shoulder, the straps are too loose. Tighten them until there’s no slack, keeping your child safe.
Checking the Chest Clip Position
The chest clip is important for keeping the harness straps right on your child’s shoulders. Move the clip up or down until it’s at the level of the child’s armpits. This keeps the straps in place during an impact.
Don’t let the clip sit on the stomach or neck. If it’s too low, it can hurt the stomach; too high, it might bother the neck. The safest spot is at the armpit line for all rear-facing passengers.
Attaching Any Additional Safety Features
Some seats come with extra head supports or body inserts for newborns. Make sure to follow the manual for these. They help keep your baby comfortable and in the right position.
Check that these extras don’t mess with the harness or strap tightness. By following this step by step car seat installation guide, you ensure your child is safe on your journey.
Common Mistakes to Avoid
Keeping your child safe starts with knowing the small mistakes that can harm a car seat’s safety. Even the most careful parents can make errors that risk their child’s safety. By using a step by step car seat installation guide, you can make sure every ride is safe.
Overly Loose Installation
One big mistake is not tightening the seat enough. If the base moves more than an inch, it’s not right. Always check the tightness after making any changes to keep your child safe.
Learn how to avoid common car seat installation mistakes by looking at safety guides. Also, remember that car seats can wear out over time. Always check the expiration date, which is usually 6 to 10 years after it was made.
Incorrect Harness Adjustment
A harness that’s too loose or in the wrong spot won’t keep your child safe. The chest clip should be at the level of the armpits, not the stomach or neck. Make sure the straps are tight enough that you can’t pinch any extra webbing.
Confusing Rear Facing with Forward Facing
It’s important to know the right position for your child’s safety stage. Many parents move their kids to forward-facing too soon. This can lower the protection in a crash. Always check your step by step car seat installation guide to make sure you’re using it right.
Consistency is key in keeping your child safe. By avoiding these common mistakes, you create the safest space for your child on every journey. Regular checks of your gear mean you’re always ready for the road.
Maintaining Your Car Seat
To keep your car seat safe, you need to check and clean it regularly. Our rear facing car seat installation tutorial shows you how to start. But, regular care is key to keeping it safe. Check your car seat at least once a month to spot any problems early.
Regular Checks for Safety
Look for frayed or thin harness straps. Also, check the plastic shell for cracks or stress marks. Always verify that the chest clip and buckle work well and are clean.
Cleaning Tips for Car Seats
Stay away from harsh chemicals when cleaning. Use mild soap and a damp cloth for the plastic and metal parts. Never submerge the harness straps in water, as it can damage them.
When to Replace Your Car Seat
Every car seat has an expiration date on it, usually six to ten years from when it was made. Replace it right away if it’s been in a crash. When your child grows out of the harness, usually around age four, it’s time for a booster seat.
| Maintenance Task | Frequency | Action Required |
|---|---|---|
| Harness Inspection | Monthly | Check for fraying |
| Shell Cleaning | Quarterly | Wipe with mild soap |
| Expiration Check | Annually | Verify date on label |
| Buckle Testing | Monthly | Ensure audible click |
By following these steps, you keep your rear facing car seat installation tutorial knowledge up to date. Regular care means peace of mind for every trip with your child.
Resources for Further Assistance
Your child’s safety is our main concern. Sometimes, you might need expert help. We offer a detailed rear facing car seat installation tutorial. But, a professional check is always the best way to be sure.
National Highway Traffic Safety Administration (NHTSA)
The National Highway Traffic Safety Administration (NHTSA) is a key resource for parents in the U.S. Their website has a tool to find certified inspection sites near you. Using these government-backed resources means you’re following the latest safety rules and practices.
“The best car seat is the one that fits your child, fits your vehicle, and is used correctly every single time.”
Local Certified Child Passenger Safety Technicians
Getting help from a certified child passenger safety technician (CPST) is very helpful. They can check your work and teach you about your car seat and vehicle. They know how to spot mistakes that you might miss.
- Verify that your harness straps are at the correct height.
- Confirm the seat angle is appropriate for your child’s age.
- Receive personalized tips for your specific vehicle interior.
Additional Educational Materials and Websites
There are also great websites like SafeKids.org that offer lots of safety info. Make sure to save these sites for future reference. They have everything from rear facing car seat installation tutorials to recall updates, all to keep your family safe.
Final Tips for Safe Travel
Keeping your child safe in a car is a big job. It needs constant attention and a strong focus on safety. Make sure to teach your kids good travel habits every time you drive.
Stay up to date with new safety rules. This way, your kids will always be safe on trips.
For the best tips on rear facing car seats, check out the guides from trusted makers. They help you understand weight limits and how to adjust the seat right. Learning these skills makes parents and caregivers feel more confident.
Always use the car seat belt around empty booster seats. This stops the seat from becoming a danger in a sudden stop or crash. Teaching others about these safety tips helps keep all kids safe on the road.
Being careful and consistent is key to keeping everyone safe. Keep your car seat clean and check if it’s expired. Your hard work keeps the most important passengers safe.
FAQ
Why Rear Facing is Safer for Infants
Rear-facing car seats are designed to protect a child’s head, neck, and spine. They absorb most of the impact in a crash. This is why they are safer for infants.
Recommended Age and Weight Limits
The American Academy of Pediatrics (AAP) suggests keeping kids rear-facing as long as possible. Parents should wait until their child reaches the maximum height or weight allowed by brands like Graco or Britax.
Common Myths About Rear Facing Seats
Some think rear-facing seats limit legroom or cause boredom. But safety is more important. Studies show rear-facing seats are safer for toddlers, even if their legs touch the seat back.
Types of Rear Facing Car Seats
There are three main types: infant-only, convertible, and all-in-one seats. The Chicco KeyFit 35 is great for portability. The Evenflo Revolve360 is good for growing children.
Features to Look For
Look for seats with no-rethread harnesses, clear level indicators, and side-impact protection. These features make installation easier and safer.
How to Choose the Best Fit for Your Vehicle
Not all seats fit every car. Measure your back seat and check for LATCH anchors. A seat that fits well in a Honda Odyssey might not work in a Toyota Corolla.
Reading the Manufacturer’s Instructions
Read both the car seat manual and the vehicle owner’s manual. Each brand has specific requirements for belt routing and handle positioning.
Gathering Necessary Tools and Materials
You might need a pool noodle or a tightly rolled towel for the correct recline angle. A camera is also helpful for documenting the setup.
Checking Your Vehicle’s Compatibility
Never install a rear-facing seat in front of an active airbag. Also, check for “trenching” in the upholstery that might prevent a firm, level base installation.
Choosing the Right Location in the Vehicle
The center of the rear seat is often safest. But if it’s too narrow, choose the “curb side” for safer loading and unloading.
Ensuring the Seat Isn’t Obstructed
Clear the floorboards and the area around the seat of any loose items. Also, ensure the front vehicle seats are moved forward enough to avoid touching the child’s car seat.
Making Sure the Angle is Correct
Newborns need a specific recline to keep their airways open. Use the built-in angle indicators to ensure the seat is angled correctly.
Understanding LATCH Components
The Lower Anchors and Tethers for Children (LATCH) system makes installation easier. Identify the metal bars hidden in the seat bight and the corresponding connectors on the car seat base.
How to Properly Attach the LATCH Connectors
Click the connectors onto the vehicle anchors, ensuring the straps are not twisted. Never use both the seat belt and the LATCH system at the same time unless the manufacturer, such as Nuna, instructs you to do so.
Verifying LATCH Tightness
Once connected, use your body weight to push down on the base while pulling the tail of the LATCH strap. This ensures a snug fit against the vehicle seat cushion.
Identifying the Seat Belt Routing
If you’re not using LATCH, locate the rear-facing belt path. Be careful not to confuse it with the forward-facing path, as using the wrong one will render the seat ineffective during a crash.
Threading the Seat Belt Correctly
Thread the lap and shoulder belt through the designated path. Keep the belt flat and free of bunches, which can interfere with the tension.
Locking the Seat Belt in Place
Most modern vehicles, like those from Ford or Chevrolet, have switchable retractors. Pull the shoulder belt all the way out to engage the locking mode, then feed the slack back into the retractor while pressing down on the car seat.
Testing the Installation with the ‘Pinch Test’
To verify stability, perform the “inch test.” Grab the seat at the belt path and pull side-to-side and front-to-back. If it moves more than one inch in any direction, your installation is too loose and must be tightened.
Verifying the Angle of the Car Seat
After tightening, re-check the level indicator. Sometimes the tension from the belt can shift the angle, and you must ensure the seat remains in the safe recline zone for the infant.
Making Adjustments as Necessary
If you cannot achieve a tight fit, you may need to try a different seating position in the vehicle or switch from LATCH to the seat belt to see which method provides better stability.
Adjusting the Harness Straps Properly
For rear-facing children, place the harness straps at or below the child’s shoulders. This prevents the child from sliding upward in the event of a collision.
Checking the Chest Clip Position
Always position the chest clip at armpit level. This ensures the straps stay over the bony parts of the shoulders, not the soft abdomen or neck.
Attaching Any Additional Safety Features
Some premium seats, like the Cybex Sirona, come with a load leg or anti-rebound bar. Ensure these are deployed and firmly locked into place to minimize seat rotation during an impact.
Overly Loose Installation
This is the most frequent error we encounter. If the seat is not rock-solid at the belt path, it cannot effectively manage the energy of a crash.
Incorrect Harness Adjustment
Avoid the “pinch test” failure on the harness. If you can pinch any webbing at the child’s shoulder, the harness is too loose and needs to be snugged further.
Confusing Rear Facing with Forward Facing
Double-check that you are using the correct belt path and the correct recline position. Installing a seat rear-facing using forward-facing instructions is a dangerous mistake that we must prevent.
Regular Checks for Safety
Vehicle vibrations can loosen a seat over time. Make it a habit to perform the “inch test” every time you put your child in the car to ensure the installation remains secure.
Cleaning Tips for Car Seats
Follow the UPPAbaby or Clek cleaning instructions strictly. Never soak harness straps in water or use harsh chemicals, as this can degrade the strength of the fibers.
When to Replace Your Car Seat
Check the expiration date stamped on the seat shell. If the seat is involved in a moderate to severe accident, replace it immediately, as internal structural damage may not be visible.
National Highway Traffic Safety Administration (NHTSA)
We rely on the NHTSA for the most up-to-date recall information and safety ratings. Their website is an invaluable tool for any parent.
Local Certified Child Passenger Safety Technicians
We encourage every family to seek out a CPST. These experts provide hands-on training to ensure we are installing our seats with 100% accuracy.
Additional Educational Materials and Websites
Organizations like Safe Kids Worldwide and the National Child Passenger Safety Board offer checklists and videos that supplement our learning and keep our children safe.
We believe that consistency is the key to safety. By making proper car seat use a non-negotiable habit, we protect our families and set a standard for everyone who travels with us.
Where can I find a step by step car seat installation guide for my specific vehicle?
Start with this step by step car seat installation guide and cross-reference it with your vehicle’s owner manual. Brands like Honda and Ford provide specific instructions on anchor locations and seat belt locking mechanisms that are essential for a safe setup.
How to install rear facing car seat models if the seat belt doesn’t seem to lock?
If you are wondering how to install rear facing car seat units in older vehicles, you may need a locking clip. In most modern cars, you can lock the belt by pulling it all the way out until it clicks, then feeding it back in to engage the Automatic Locking Retractor (ALR).
What are the best practices for rear facing car seat installation regarding winter clothing?
Avoid putting children in bulky coats. Buckle them in their regular clothes first for a tight harness fit. Then, place a blanket or coat over the top of the straps to keep them warm.
Can I watch a rear facing car seat installation tutorial online for my specific brand?
Yes, many reputable manufacturers like Graco and Chicco host an official rear facing car seat installation tutorial on their websites. Also, check the NHTSA YouTube channel for professional demonstrations of the “inch test” and LATCH usage.
What are the most important car seat safety tips for rear facing infants?
Our top car seat safety tips for rear facing include ensuring the harness is at or below the shoulders, the chest clip is at armpit level, and the seat is installed at the correct recline angle to prevent the infant’s head from flopping forward.
How can I arrange a professional rear facing car seat installation demonstration?
We highly encourage parents to find a Certified Child Passenger Safety Technician (CPST) for a rear facing car seat installation demonstration. You can locate a local technician through SafeKids.org or your local fire and police departments.
Is there a car seat installation guide step by step for rear facing seats that covers the LATCH weight limits?
Yes, every car seat installation guide step by step for rear facing seats should mention that LATCH anchors have weight limits. Once your child and the seat combined exceed 65 pounds, you must switch from LATCH to the vehicle seat belt system to ensure the anchors do not fail.
Why is a rear facing car seat installation considered the gold standard for toddlers?
A rear facing car seat installation is the gold standard because it provides the best protection for the head and spine. By keeping the child in this position until they reach the maximum limit of seats like the Britax One4Life, we minimize the risk of serious injury during a frontal collision.

Hello! I’m Moheen Iftikhar, the founder of «CarMotivei». I’m dedicated to covering modern automotive trends, new car technologies, and useful driving insights to keep car lovers updated and motivated. Here, you’ll find detailed car reviews, expert automotive content, and helpful tips for drivers and enthusiasts alike.